一、前言
- 最近测试一个开源项目,发现生成的
全局id 有重复,也没有单元测试,就准备贡献个 PR - 想到多线程并发测试,根据经验,第一想法是用 Testng,后面看了下 Junit5 也有实验性支持了,就对比下(以
maven 为例) - spock 不太适合这种场景
1. 安装
- 选择 使用数 比较多、也比较新 的版本,7.7.1。<testng.version>7.7.1</testng.version>
- 多模块项目,可以在 根pom.xml里面添加依赖,避免每个模块都增加配置哦
1
2
3
4
5
6
7
8
| <dependencies>
<!-- test -->
<dependency>
<groupId>org.junit.jupiter</groupId>
<artifactId>junit-jupiter</artifactId>
<scope>test</scope>
</dependency>
</dependencies>
|
2. 使用
 1
 2
 3
 4
 5
 6
 7
 8
 9
10
| public class UniqueIdGeneratorTest {
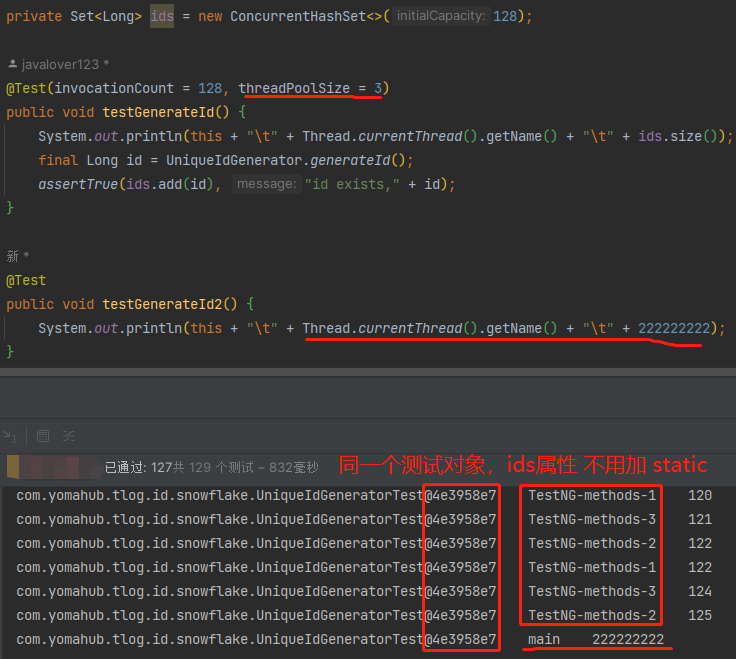
private Set<Long> ids = new ConcurrentHashSet<>(128);
@org.testng.annotations.Test(invocationCount = 128, threadPoolSize = 3)
public void testGenerateId() {
final Long id = UniqueIdGenerator.generateId();
assertTrue(ids.add(id), "id exists," + id);
}
}
|
3. 效果

1. 安装
- 选择 使用数 比较多、也比较新 的版本,5.8.2。<junit-jupiter.version>5.8.2</junit-jupiter.version>
- 最好通过 dependencyManagement 来统一版本,尤其是 多模块项目
- 建议放到 spring-boot-dependencies 前面,优先级更高
 1
 2
 3
 4
 5
 6
 7
 8
 9
10
| <dependencyManagement>
<dependencies>
<dependency>
<groupId>org.junit</groupId>
<artifactId>junit-bom</artifactId>
<version>${junit-jupiter.version}</version>
<type>pom</type>
<scope>import</scope>
</dependency>
</dependencies> </dependencyManagement>
|
多模块项目,可以在 根pom.xml里面添加依赖,避免每个模块都增加配置哦
1
2
3
4
5
6
7
8
9
| <dependencies>
<!-- test -->
<dependency>
<groupId>org.testng</groupId>
<artifactId>testng</artifactId>
<version>${testng.version}</version>
<scope>test</scope>
</dependency>
</dependencies>
|
- System properties 配置方式,更适合多模块项目(根pom.xml配置,子模块就不用配置了)
 1
 2
 3
 4
 5
 6
 7
 8
 9
10
| <plugin>
<groupId>org.apache.maven.plugins</groupId>
<artifactId>maven-surefire-plugin</artifactId>
<version>2.18.1</version>
<configuration>
<argLine>-Djunit.jupiter.execution.parallel.enabled=true -Djunit.jupiter.execution.parallel.config.strategy=fixed
-Djunit.jupiter.execution.parallel.config.fixed.parallelism=3 -Djunit.jupiter.execution.parallel.config.fixed.max-pool-size=3
</argLine>
</configuration>
</plugin>
|
- 配置文件
test/resources 目录下,增加 junit-platform.properties 文件,内容如下:
 1
 2
 3
 4
 5
 6
 7
 8
 9
10
| #是否允许并行执行true/false
junit.jupiter.execution.parallel.enabled=true
#是否支持方法级别多线程same_thread/concurrent
junit.jupiter.execution.parallel.mode.default=concurrent
#是否支持类级别多线程same_thread/concurrent
junit.jupiter.execution.parallel.mode.classes.default=concurrent
# the maximum pool size can be configured using a ParallelExecutionConfigurationStrategy
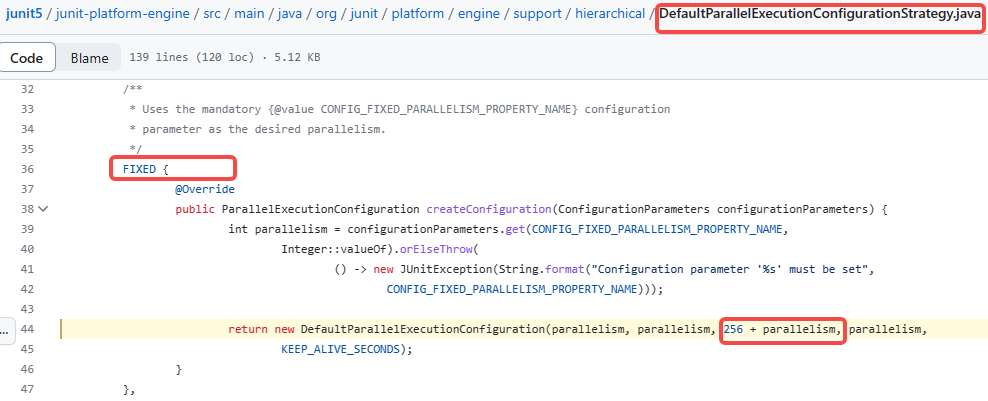
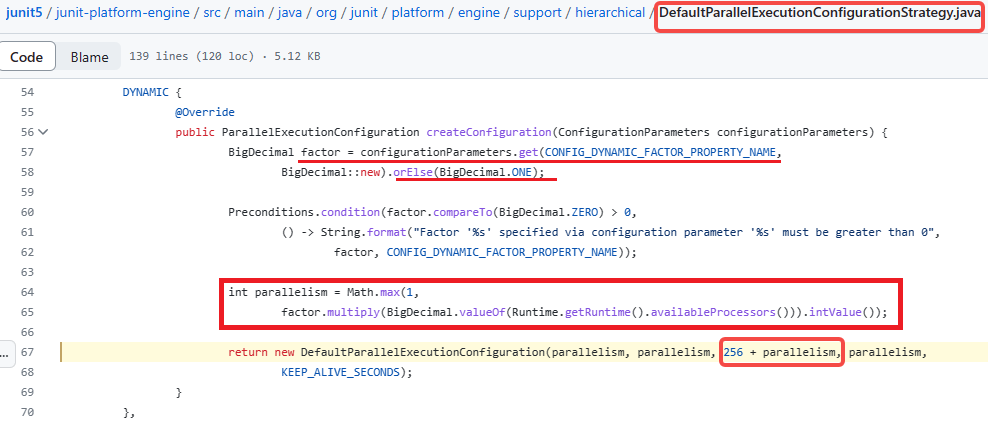
junit.jupiter.execution.parallel.config.strategy=fixed
junit.jupiter.execution.parallel.config.fixed.parallelism=3
junit.jupiter.execution.parallel.config.fixed.max-pool-size=3
|
4. 使用
 1
 2
 3
 4
 5
 6
 7
 8
 9
10
| class UniqueIdGeneratorTest2 {
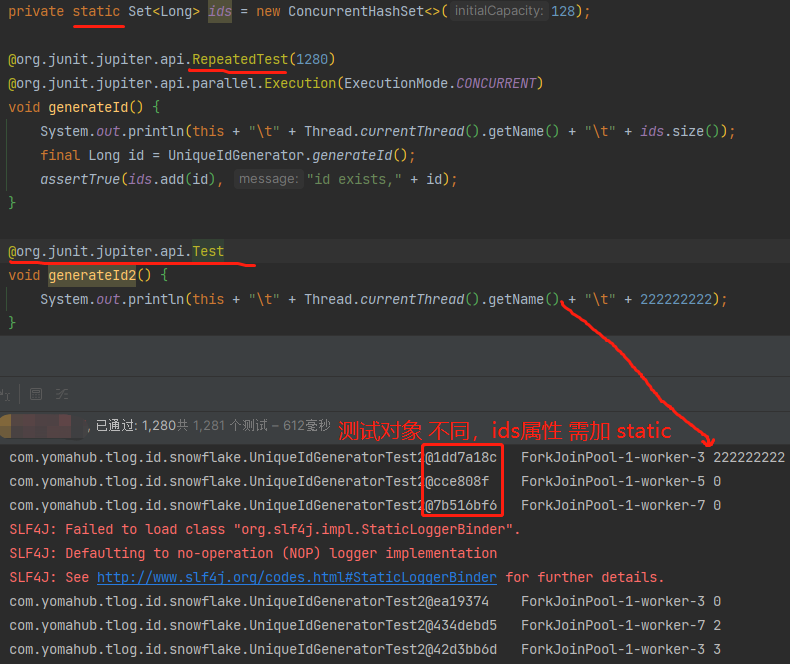
private static Set<Long> ids = new ConcurrentHashSet<>(128);
@org.junit.jupiter.api.RepeatedTest(128)
@org.junit.jupiter.api.parallel.Execution(ExecutionMode.CONCURRENT)
void generateId() {
final Long id = UniqueIdGenerator.generateId();
assertTrue(ids.add(id), "id exists," + id);
}
}
|
5. 效果

四、总结
本文遵守【CC BY-NC】协议,转载请保留原文出处及本版权声明,否则将追究法律责任。
本文首先发布于 https://www.890808.xyz/ ,其他平台需要审核更新慢一些。


